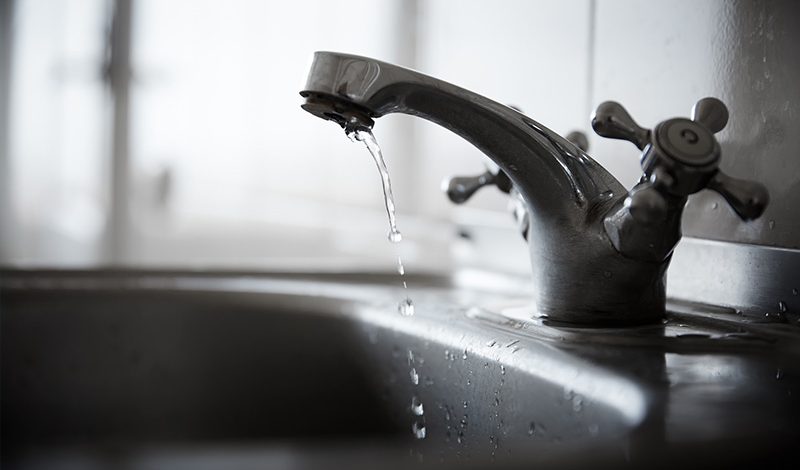
Some people believe that ignoring a leaky tap will eventually make it stop, but this is far from the truth. Rather than leaving your leaky tap to become worse over time, knowing the knack for changing a tap washer will not only remedy the situation but also arm you with crucial knowledge when it comes to handling similar issues in the future.
Fortunately, changing a washer on a tap is a simple task that you can complete within a few minutes. Even more interesting is that it doesn’t require any special or heavy equipment to solve the problem. There’s no drilling, no struggling with pipes, or coming into contact with harmful chemicals. In fact, you can consider changing a tap washer one of the simplest, safest, and most satisfying DIY jobs you will ever do.
Why consider changing a washer on a tap?
From experience, a dripping tap has a good chance of becoming a significant problem, if care is not taken. Regardless of how well you try to tighten it, the leak will continue while all you get in return is a sore hand from the struggle – or in the worst case, the tap failing to turn back on.
However, rather than living with an unpleasant drip-drip-drip situation, there is a simple and effective solution – getting your tap washer changed. Over time, tap washers tend to get old, worn out, and become less effective than before. In most cases, replacing your tap washer is enough to solve the issue of a leaky tap. However, in an unfortunate scenario where the leaky tap problem persists straight after changing the tap washer, skip to the last section of this guide where we have explained other possible causes of this problem.
Where can I find my tap washer?
Ideally, a tap is made up of the seat and the tap washer. Turning a tap on will force the washer towards the seat, and consequently leads to a pressure build-up. Once the pressure builds up, the water will be forced out of the spout into the sink. On the other hand, turning the tap off will push the washer against the seat, and makes a watertight seal to prevent water from moving out of the tap.
Keep in mind that tap washers can wear out or become damaged, and as a result become a pesky leaky tap. Due to wear and tear, the washer may lose its watertight seal capability, leading to a small amount of water dripping from the spout. In such a case, getting your tap washer changed should solve the problem.
You can get a new tap washer at a low price from any hardware or DIY store. Tap washers are available in different sizes. Usually, you will get them in a pack of four, so you can use one and keep the rest for future use.
How can I change a tap washer?
First, you have to check if your taps are standard – the reason is that this guide has been made to focus on such taps. If you’re not sure whether your tap is standard or not, ask the right plumbing professional. This is because some taps work differently from others, and even though this guide may work for you, we can’t guarantee that. So, do your homework.
Secondly, to change your tap washer successfully, you need to have some small pieces of equipment sy hand. It is most likely that you have them already within your house, but if you don’t, you can either purchase them or borrow them from a neighbour or friend. These pieces of equipment include a spanner, a piece of cloth or an old towel, and a flat-headed screwdriver. That’s all!
Now, here are seven simple steps for changing your tap washer in double-time:
Step 1: Before you start, turn off your water supply or you could flood your kitchen or bathroom. Beneath the tap, you should see an isolation valve with which you can turn off the water leading to a specific sink. But if you can’t find the valve, move to the mains and turn off the whole water supply. If you are replacing the tap washer on a hot water tap, endeavour to switch off the heater too.
Step 2: Now, put the plug into the plug hole of the sink to prevent you from losing any tap components such as the screws down the drain. Also, it is best advised to spread your old towel inside the sink. This will prevent any damage to the surface in case you drop something.
Step 3: Remove the cover of your tap with the screwdriver. By now, the valve should have been exposed – now remove it by using the spanner. In some cases, the valve may be stiff, so use the wrench to hold the tap. Cover the tap with a cloth first before using the spanner to remove the valve.
Step 4: Underneath the valve, you will find the tap washer fixed with a nut or a screw. Use a spanner to remove the tap washer. But, in case the removal is becoming a problem, add a little penetrating oil around the tap washer, leave to soak, and then try removing it again.
Step 5: Place the new tap washer into the position of the old, worn washer – ensure that they are the same size.
Step 6: Re-assemble the tap. Use a screwdriver to put the valve back into position without over-tightening it as it can damage the tap. Then, get the top back on the tap and fasten it.
Step 7: Take out the towel from the sink, remove the plug, and turn on the water. Now, look at the amazing job that you have done and serve yourself a nice beverage as a treat!
Recommendations
You can go further by checking the valve during the process of changing the tap washer. If you realise that the valve is old, rough or worn out, then expect the seal between the seat and the washer to be ineffective. The implication is that even after changing the tap washer, the leaking issue may persist and all your hard work was for nothing. Replacing the washer and the valve together may be a little complicated, but still doable. However, in case you are confused, contact a specialist.
How to prevent leaking taps
If you would like to prevent the occurrence of any future leaky taps, or to replace your tap washer, using a tap with ceramic disc cartridges is the way to go. Compared to compression washers, ceramic disc taps have higher durability. Also, they are exceptionally resilient – which means you won’t be changing them again in the near future!
Hopefully, we have not only equipped with you the skills required to change your tap washer successfully, but also the confidence needed to get the job done.
Good luck!